ComfyUI is one of the powerful GUIs for the rapidly emerging open-source image generation AI, Stable Diffusion. Surpassing the popularity of AUTOMATIC1111, it allows users to easily create and modify various workflows, gaining widespread popularity. However, many people still find ComfyUI challenging to use. This article introduces a comprehensive tutorial covering everything from the basics to advanced techniques of ComfyUI.
Why Choose ComfyUI?
ComfyUI is closely tied to Stable Diffusion and requires some technical understanding, but it offers powerful features in return. It allows users to easily create and modify various workflows, enabling image generation in diverse ways. While AUTOMATIC1111 offers robust functionality, ComfyUI provides a more intuitive and flexible user experience.
Getting Started: Installing and Using ComfyUI
To start with ComfyUI, installation is necessary. The ComfyUI Academy offers YouTube lectures that explain various features step by step, starting from the installation process. By following along with these lectures, you can easily master ComfyUI.
Summary of Installation Steps
- Download and Install ComfyUI: Download the latest version from the official website.
- Set Up Required Files and Folders: Place the necessary files in the ComfyUI installation folder.
- Run the Basic Workflow: Load and run the basic workflow file.
Magical Img2Img and WD14 Usage
One of the powerful features of ComfyUI is image generation using Img2Img and WD14. This feature allows you to create new images based on input images. For example, you can use ComfyUI to transform an image generated by MS Copilot using an automatic inpainting/outpainting workflow.
Img2Img Workflow Example
- Load Image: Load the desired image.
- Resize Image: Add an Image Resize node to adjust the image size.
- Adjust Noise Removal Intensity: Adjust the noise removal intensity to create the desired style of image.
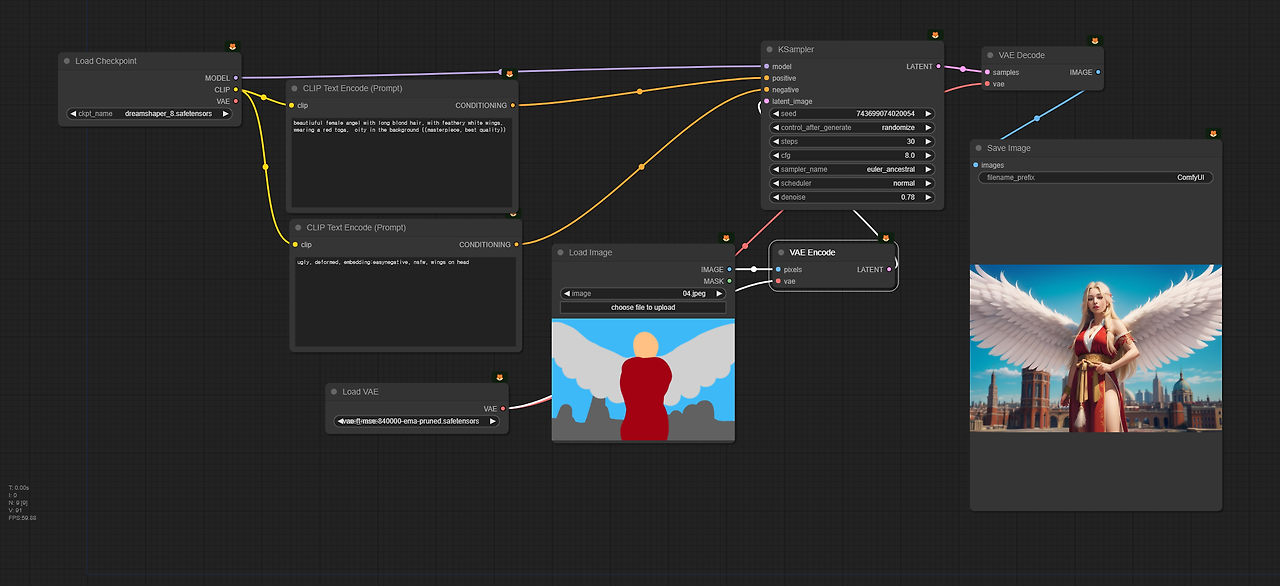
Image Generation Without Prompts
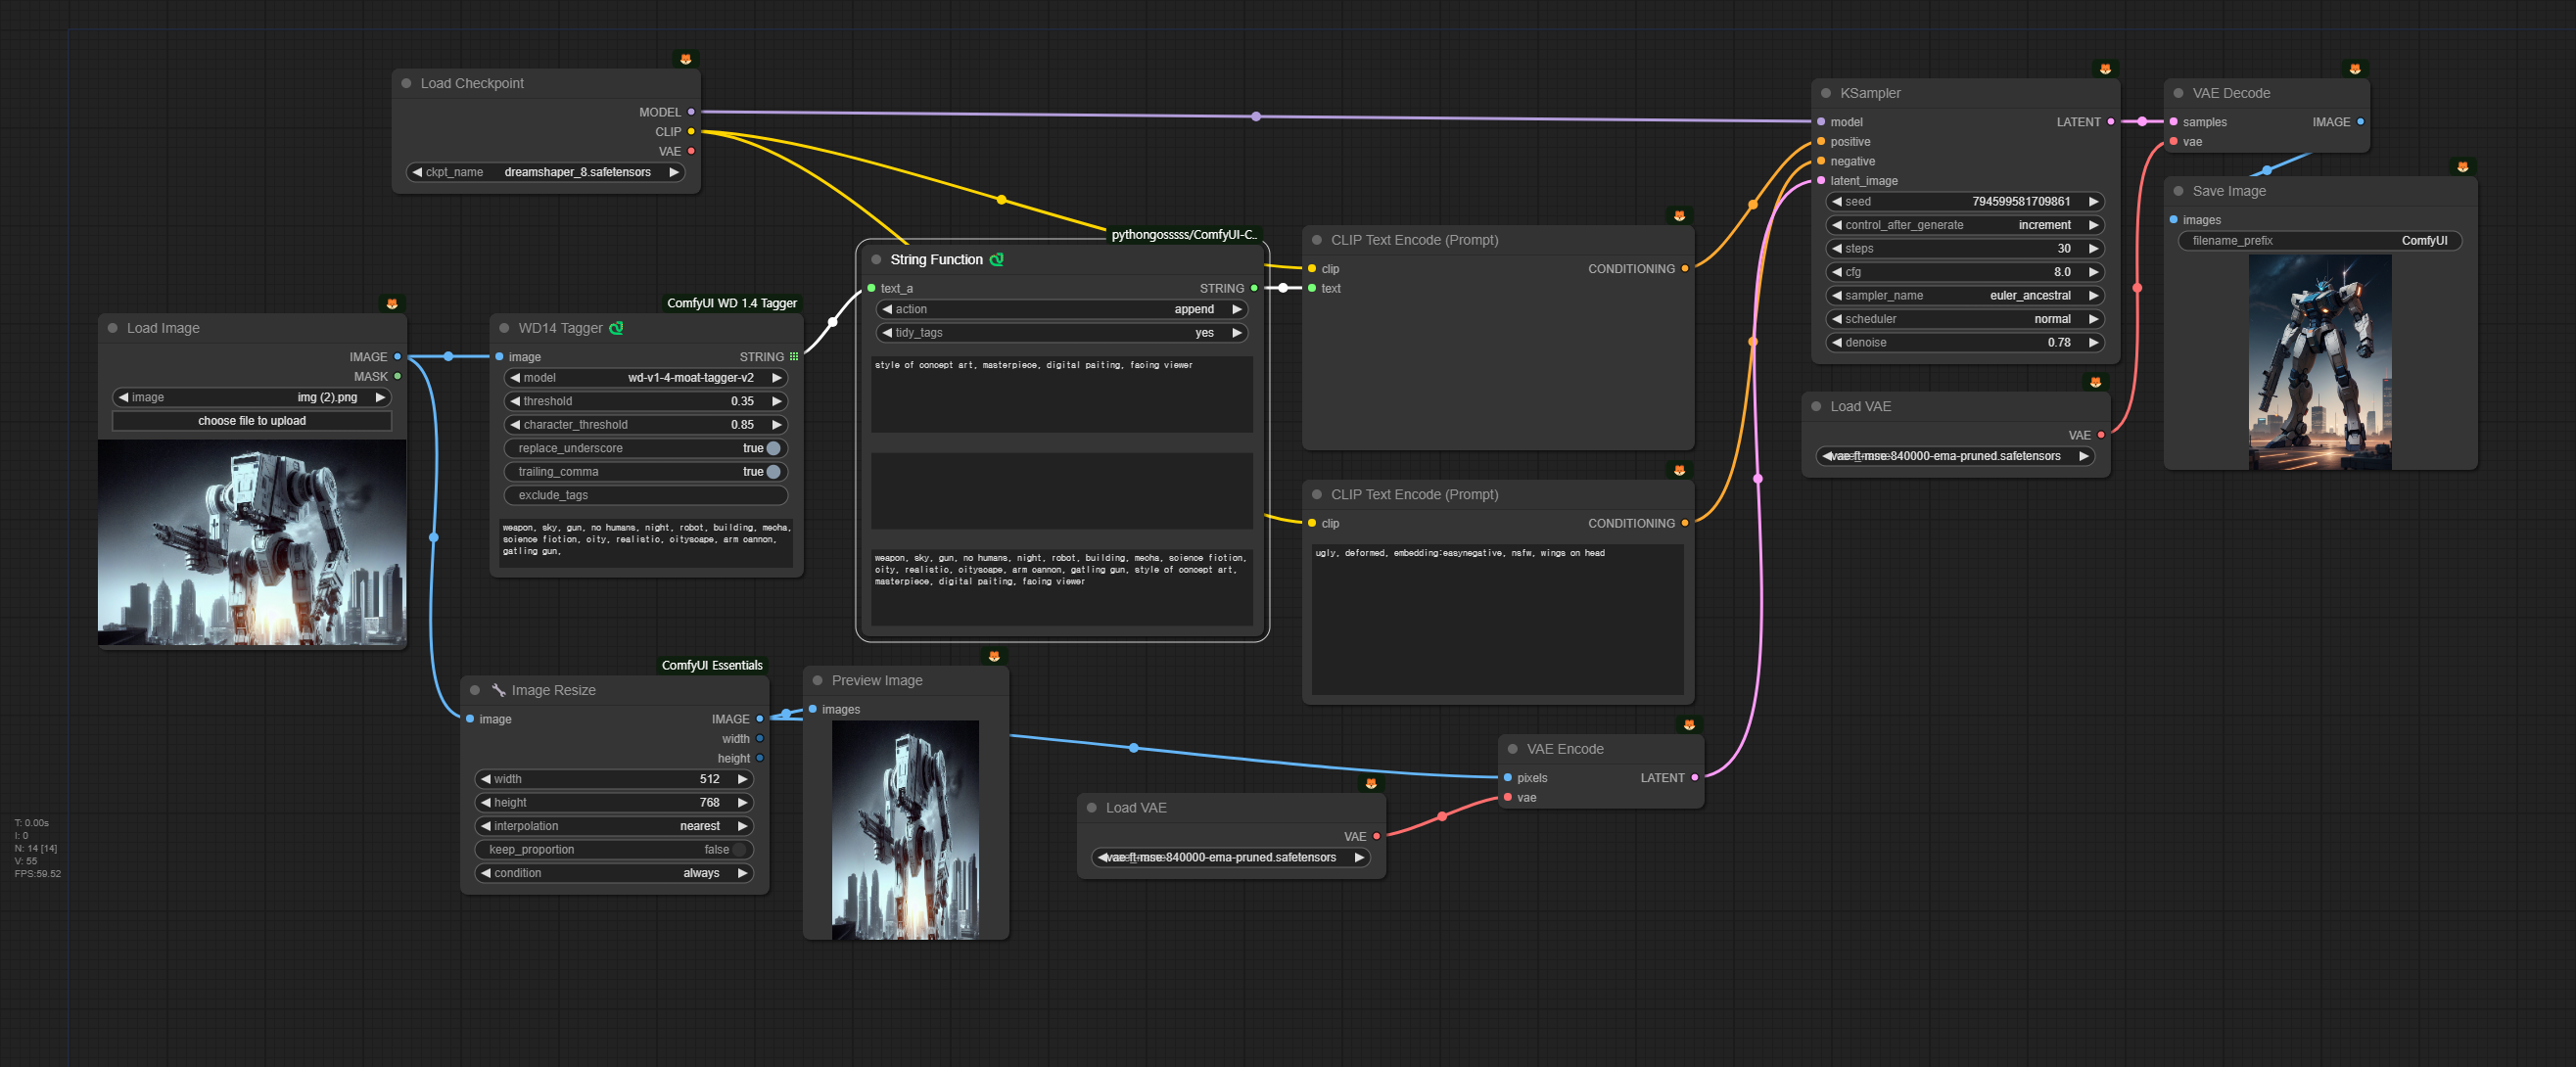
There is a workflow that allows image generation without entering a prompt. This feature automatically generates prompts based on the input image and creates an image. It uses the WD14 Tagger to analyze the input image and automatically generate prompts.
Prompt-Free Img2Img Workflow Example
- Load and Analyze Image: Load the image in the Load Image node and analyze it with WD14 Tagger.
- Generate and Combine Prompts: Combine the analyzed prompt with additional text to create the final prompt.
- Generate Image: Generate a new image based on the created prompt.
Model Swapping and Masking
ComfyUI also offers features for model swapping and masking to redraw specific parts of an image. These advanced techniques allow for more precise image generation.
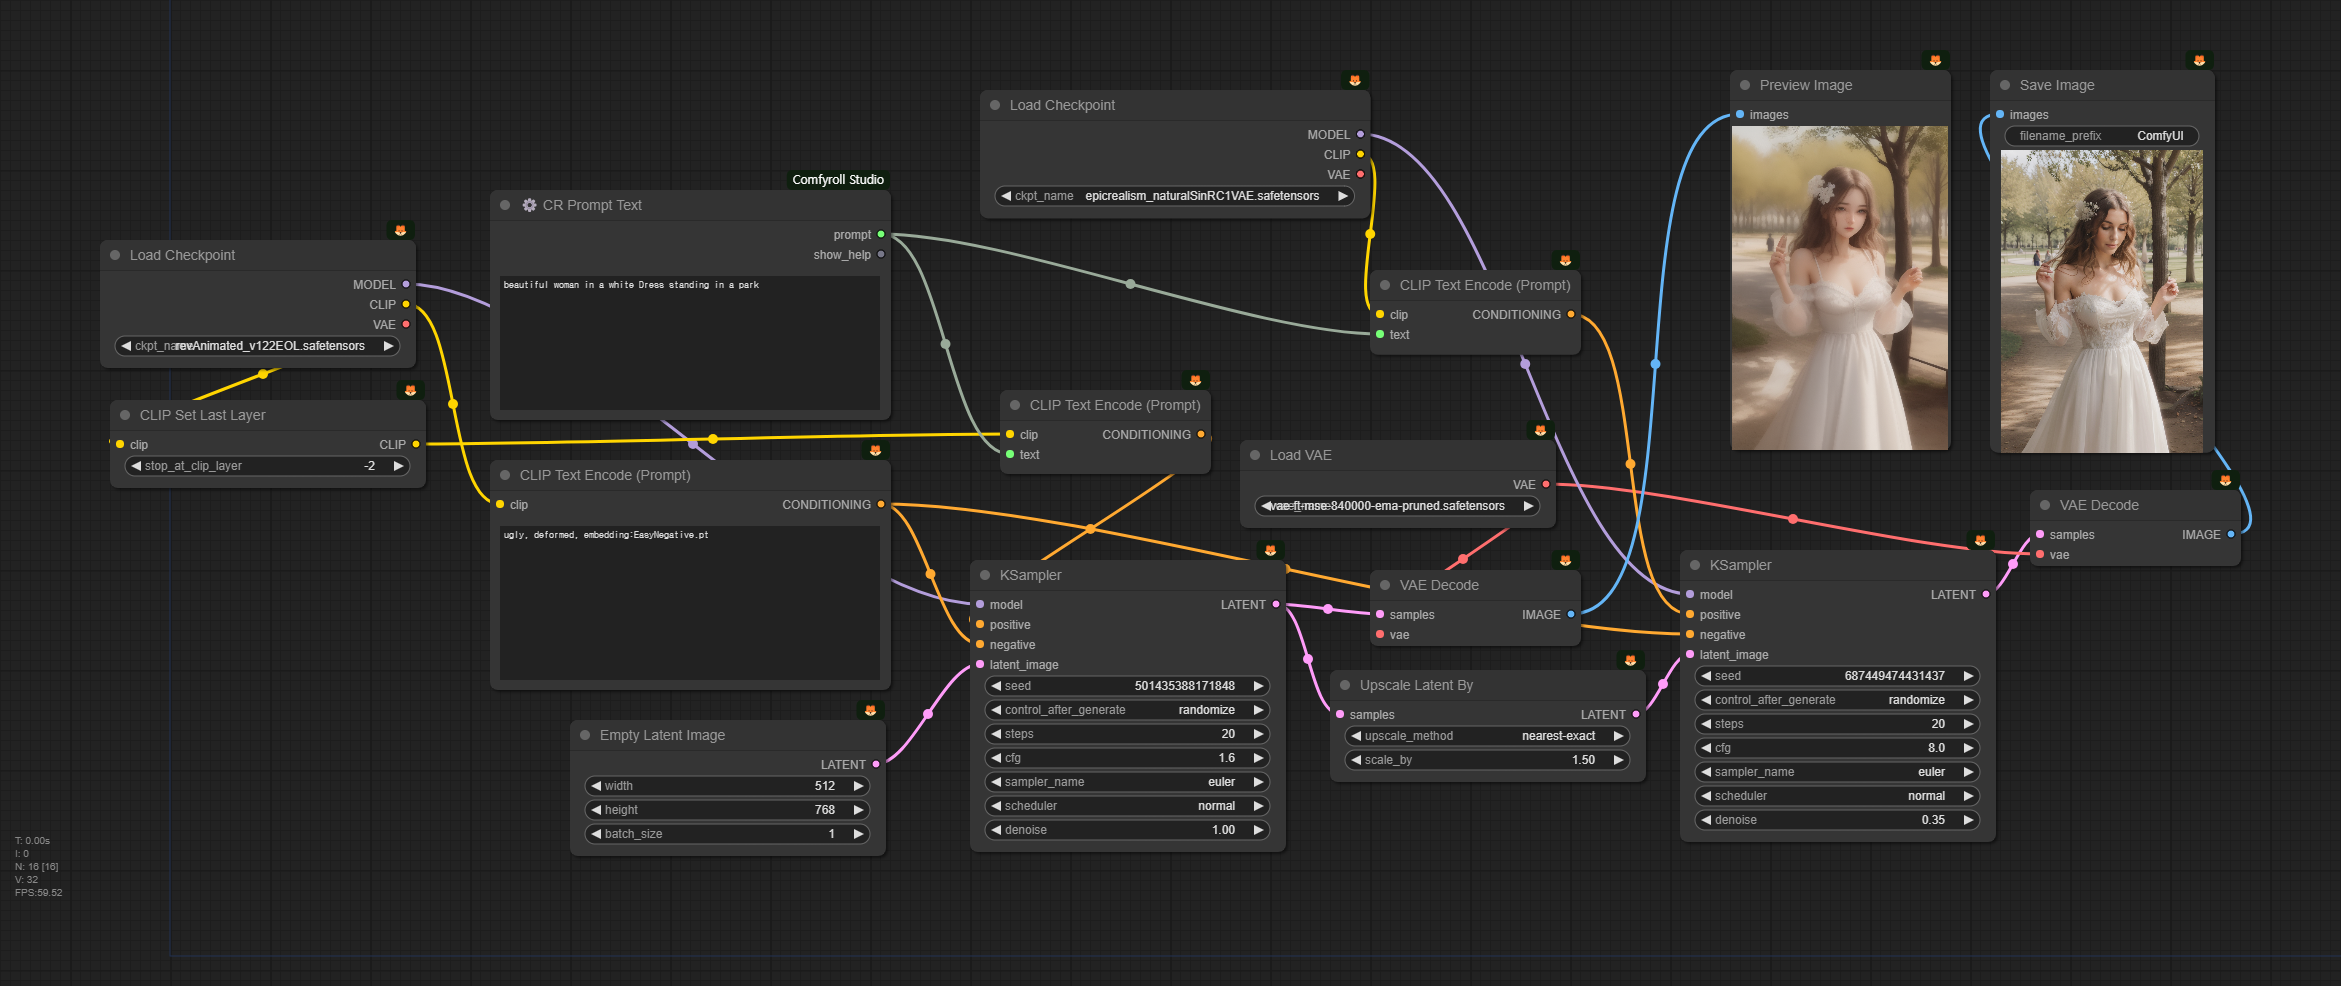
Model Swapping Example
- Use Two Models: Use the revAnimated model in the first KSampler node, and the epicRealism model in the second KSampler node.
- Upscale Latent Image: Use the [Upscale Latent By] node to upscale the latent image.
Inpainting Example Using Masking
- Create Mask: Load an image in the Load Image node, and draw on it using the mask editor to specify the areas to modify.
- Inpaint Image: Redraw only the specified mask areas to create the desired image.
Conclusion
ComfyUI opens up new possibilities for image generation AI with its powerful features and flexible usability. This tutorial helps you understand and utilize everything from the basics to advanced techniques of ComfyUI. Now, try creating amazing images with ComfyUI!
Reference: OpenArtFlow, “ComfyUI Academy”